YPQs (Your Possible Questions)
1. Experience level in making helmets:
-Level 1 (first-time)
2. How long did it take to finish?
-Half a day
3. What materials were used?
-a really cheap safety helmet
-tape measure
-marker
-pattern paper or newspaper will do
-illustration board
-handy bow saw
-sand papers (cc400cw)
-a dozen of the smallest screws and nuts
-cutter and scissors
-sticky tape
-duct tape
-spatula
-mask
-polyester body filler or putty used for cars (you can get this from any hardware stores) + hardener
-airbrush
-surface primer
-white spray paint (400cc)
4. How to make it?
STEP1: Remove the inner foam of the helmet.
STEP2: As you can see in the picture, the "peak" or "bill" of Char's helmet is more of a V while the safety helmet we have is more of a U.

 STEP 3: Draw a V. Make sure you find the center point.
STEP4: Following the mark you've made, saw the bill. You don't have to use too much force when sawing.

STEP5: Sand the rough edges of the sawed bill.

Step 6:Using this reference photo, draw the helmet's "back arc" (sorry we don't know how else to call it) on a pattern paper. Cut and paste it on your helmet to see if it fits and if it's the right length on you.
 STEP7: Once you've finalized the pattern, trace it on your illustration board and cut.
STEP8: Then, screw the board on your helmet.
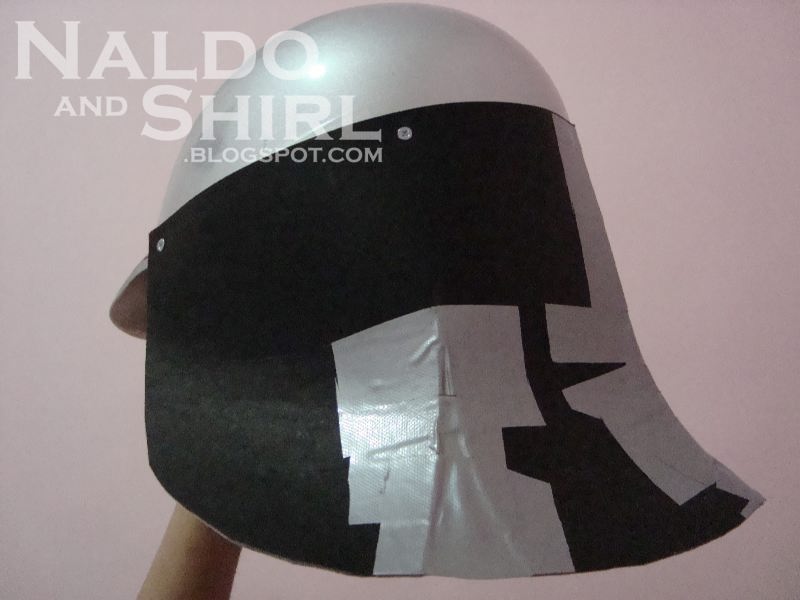 If you want to have that slightly arc effect at the bottom, cut a triangle then bent it outwards a little bit. Cover it up with duct tape.
STEP9: Apply putty to cover the screws and to make the helmet and board look as if they're one piece. By the way, please don't forget to wear mask. The putty smell can be really strong.
 STEP10: Let the putty dry.
 STEP11: When it's dry, the surface will be very uneven. So sand it.
 It doesn't have to look smooth but it has to FEEL smooth. If after sanding and you still notice hollow parts, just cover the small holes with putty. Dry then sand again.
 STEP12: Paint it with surface primer. You may hand-paint if you want but Naldo used air-brush. It's way faster. Then wait for it to dry.
 STEP13: Make the W. We won't be giving instructions on how to do it since it's really easy.
 STEP 14: After you're done with the W, attach it to the helmet. There are so many ways, you can double tape, glue or screw it. It really depends on you.
STEP15: Spray Paint.
 STEP16: Let it dry and voila!
If you don't want to go through all the trouble of making your own, there's this (refer to photo below) for sale. As to where and how to get it, we are not really sure. Even we ourselves couldn't find it. We think it may be only available in Japan or maybe it can be ordered online. 
Anyway, we hope we helped and if you have more questions, the comments box is below.
p.s. Here's a photo of the putty and the hardener we're talking about.

